If you were with someone and they went into cardiac arrest, would you know what to do? If you’ve had CPR training, your answer is likely an immediate “Yes.” However, if you have never gone through training, or you’re a little rusty, you may hesitate. The truth is, anyone can do CPR. It is a relatively simple procedure that can be performed quite easily – and it could save a life.
Debunking the Movie and TV Myths
If you’ve ever seen CPR performed in a movie or on a television show, chances are, it was not done correctly. In fact, it is very rarely portrayed accurately on film. What is typically shown on TV is a range from five compressions and one rescue breath to the more current fifteen compressions and one or two rescue breaths. While the latter is actually compliant with earlier guidelines, you will very rarely see the 100 to 120 chest compressions per minute or the 30 compressions to 2 rescue breaths per the current guidelines.
Updated Guidelines on Compression-only CPR
Since around 2010, the guidelines for CPR have been shifting to focus more on chest compressions and less on rescue breathing. The American Heart Association released guidelines that omit rescue breathing altogether. Instead, the person performing the CPR is instructed to perform rapid chest compressions without stopping.
The reasoning for this change is twofold. Most medical professionals agree that chest compressions are more important because they keep a continuous blood flow which increases the person’s chance of survival. This change also makes it easier for the untrained bystander to step in and help because it is easier to remember.
CPR: What You Need to Know
The compression to breath ratio for adults, children, and infants is 30 compressions to 2 rescue breaths. These are a few other facts you should know about CPR:
- Compressions should be between 100 and 120 compressions per minute (that’s about two compressions per second)
- Compressions should be hard: around 2 to 2½ inches of force for an adult or teen
- When performing chest compressions on an adult or teen, don’t use just your arms; use your entire upper body
- Compressions can cause bruising and, in some cases, even result in a broken rib, but hard and fast is necessary to save a life
- Just about anyone can do CPR
- If the mouth is injured, you can blow into the nose for rescue breathing
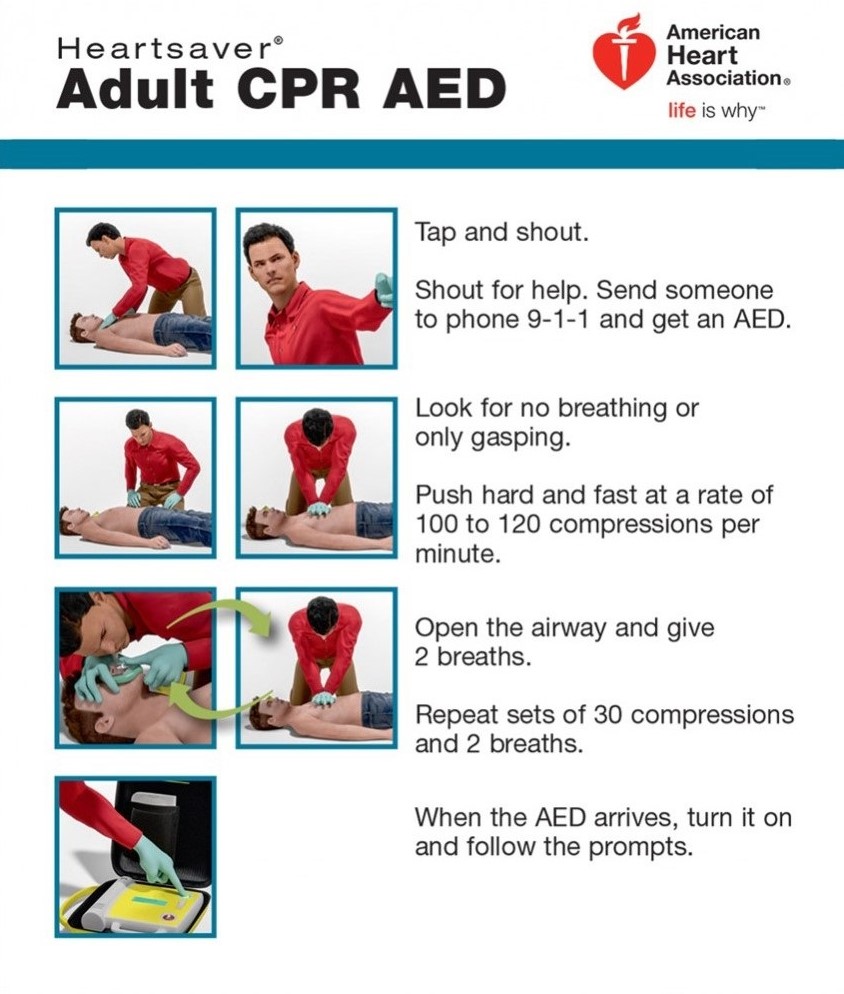
How to Perform CPR on an Adult or Teen
To perform CPR on an adult, follow these steps:
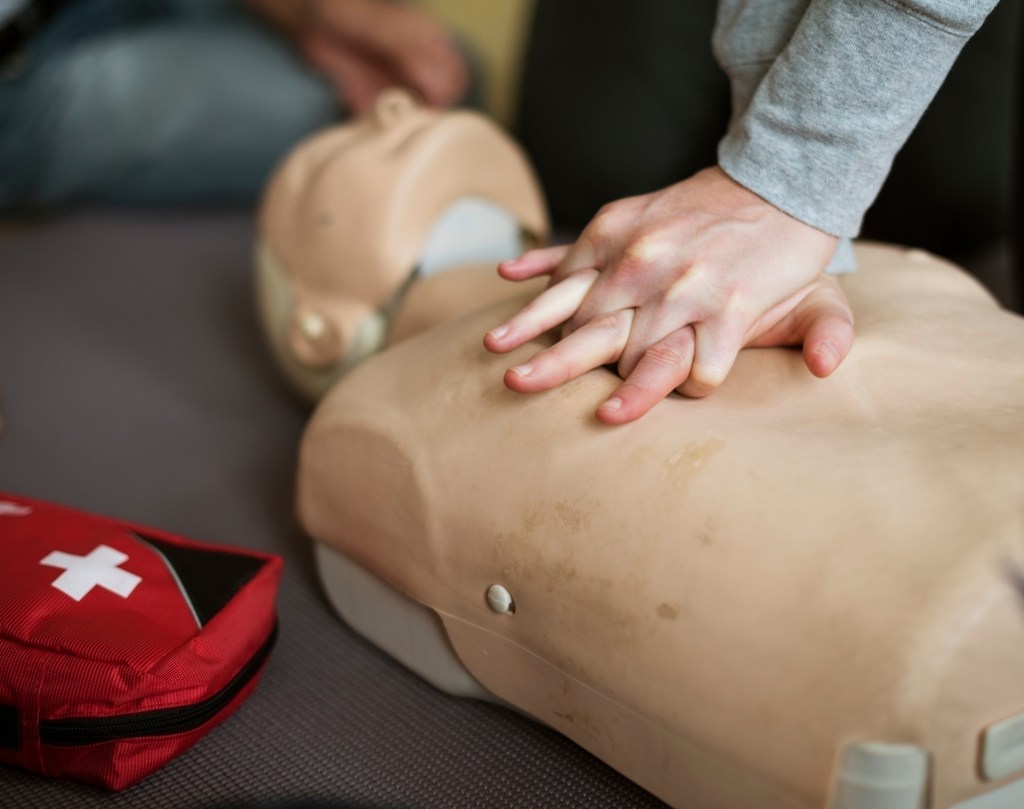
- Place the person on a firm surface, on their back
- Knee beside them, near their shoulders and neck
- Place the heel of your hand on the person’s chest, between the nipples (about the center), and place your other hand on top so the palm is in contact with the back of the first hand.
- Interlace your fingers
- Bring your upper body directly over the person so that your shoulders are centered over your hands
- Straighten your elbows
- Push straight down, using your upper body to deliver a forceful compression of the chest. It should compress at least 2 inches but no more than 2.5 inches, then release to complete the compression (the chest should return to its normal position)
- Push hard and fast, aiming for 100 to 120 compressions per minute
- Continue until the person shows signs of movement or until emergency responders take over.
If you have been trained in CPR or feel comfortable, provide two rescue breaths after 30 compressions:
- If you think the person could have something in their mouth (such as gum or food) clear it out
- Using the hand nearest to person’s shoulder, gently slip it under the person’s neck so that your fingers are touching the base of their skull (there is a natural curve in that part of the neck for most people – that is where you want your hand to be)
- Using your other hand, place two or three fingers under the chin
- In a firm yet gentle motion, bring your hand up against the person’s neck so that their head starts to tilt back. At the same time, use your fingers under the chin to guide the head up and the lower law open
- Keeping your fingers under the chin (for control), use your other hand to gently pinch the nose closed.
- Place your mouth over the person’s mouth and blow (not too hard, but hard enough to make the chest rise)
- Watch the chest to make sure that it rises
- Do this twice, then return to compressions.
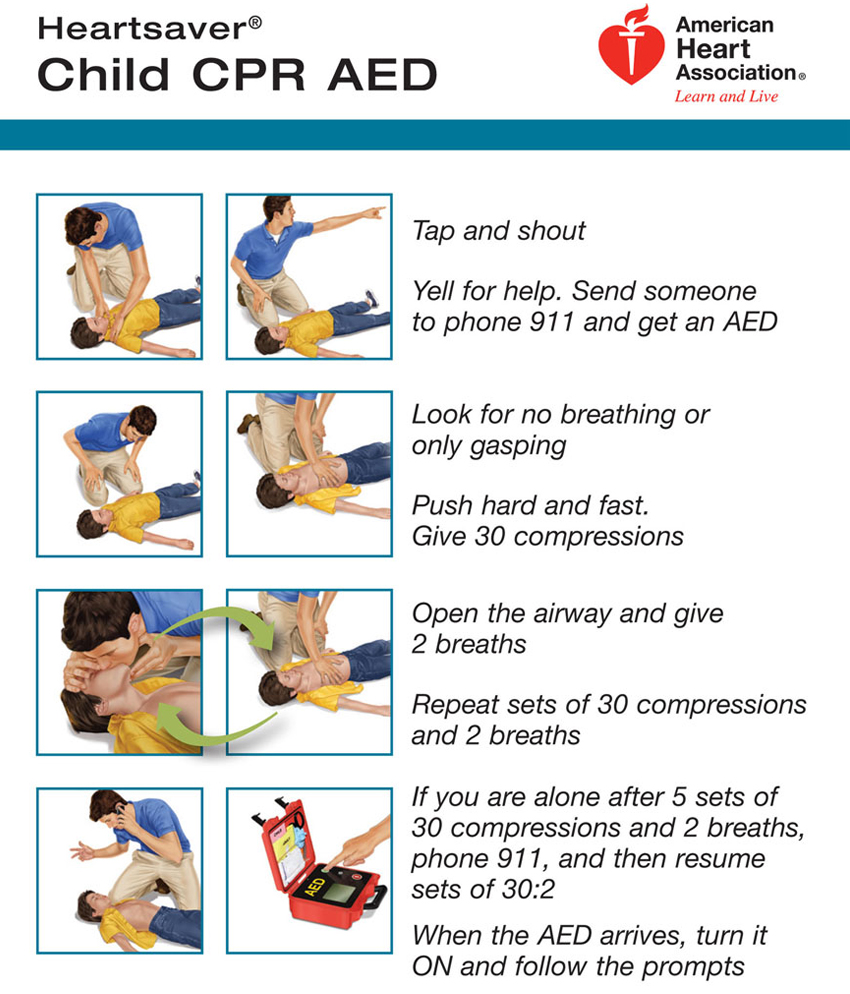
How to Perform CPR on a Child
The process for child CPR (older than 1 year up to around puberty) is very similar to adult CPR with the primary difference being that you don’t push as hard. Pushing on a child’s chest as hard as you would an adult’s chest could cause serious damage. If you are giving rescue breaths, they should not be as hard either. Of course, a larger child may require more aggressive actions, but a smaller, slighter child should be treated more delicately. Always take the child’s size as well as age into consideration before you begin CPR.
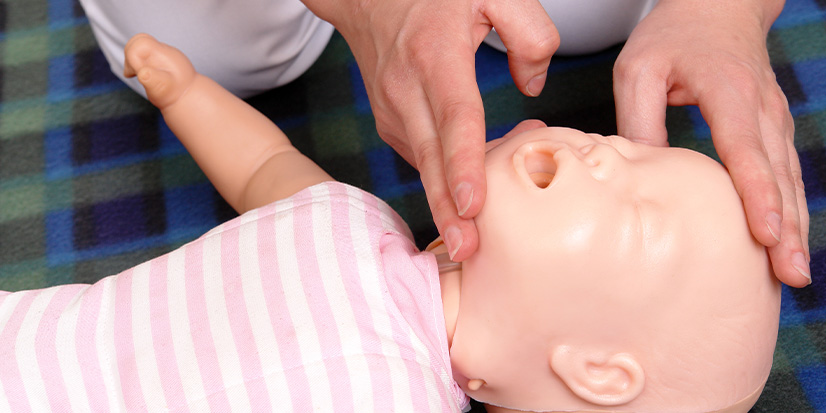
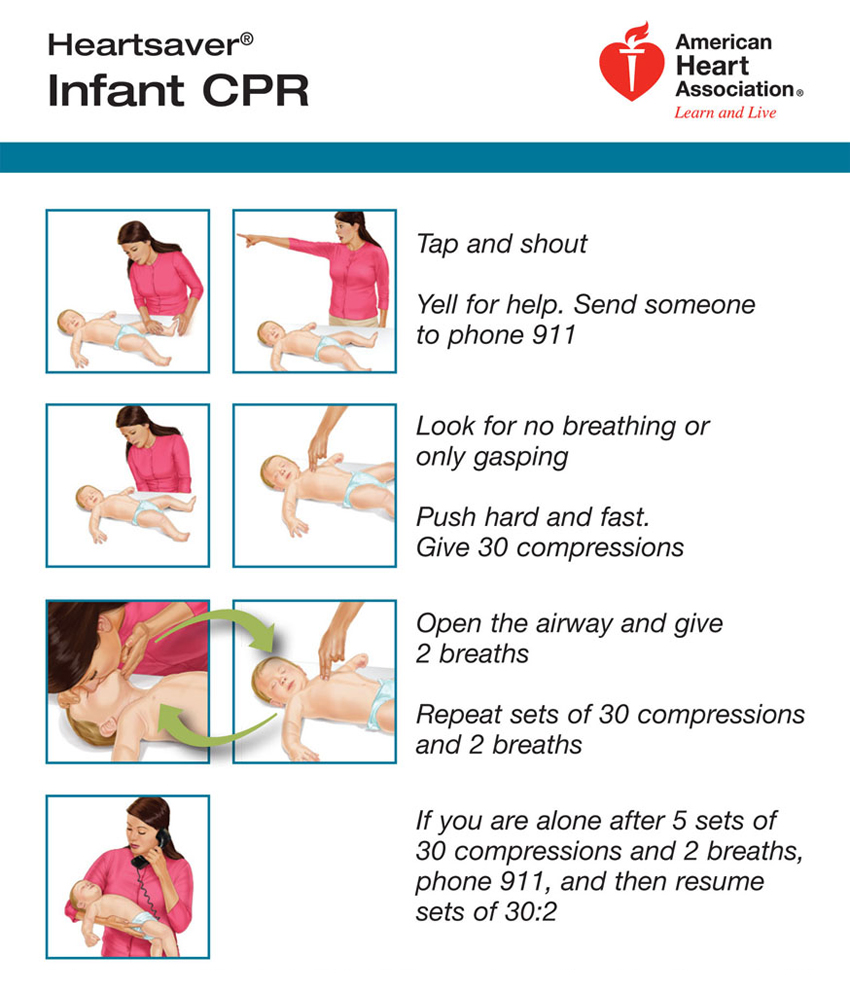
Performing CPR on an Infant
Infant CPR follows the same steps, but the technique is different. This type of CPR is performed on infants up to 1-year-old (although there are some exceptions if the child is very slight or small).
- Place the infant on a firm surface, on their back, hold them in your arms, or across your lap
- Place two or three fingers on the infant’s chest, just below the nipples (about the center).
- Push straight down with your fingers to deliver a compression of the chest. Press hard, but not too hard, (the reason you use your fingers), to compress the chest about 1 to 1½ inches, then release to complete the compression (the chest should return to its normal position)
- Push hard and fast, aiming for 100 to 120 compressions per minute
- Continue until the infant shows signs of movement or until emergency responders take over.
If you have been trained in CPR or feel comfortable, provide two rescue breaths after 30 compressions:
- If you think the infant could have something in its mouth, such as food or some obstruction, clear it out
- Use your hand to gently cup the back of the infant’s head, touching the base of its skull to tilt the head back, at the same time placing two or three fingers under the chin to open the mouth and guide the head back.
- Place your mouth over the infant’s mouth and nose.
- Blow a puff of air into the infant’s mouth and nose, watching to ensure that the chest rises and falls. Don’t blow too hard; blow like you are blowing out a candle.
- Do this twice, then return to compressions.
CPR is something you never want to actually use, but if you are in a situation where you need it, you’ll be so glad you know it. It could enable you to save a life.